Portworx Documentation has moved to https://docs.portworx.com
For Portworx Backup version 2.5 and later, refer to the documentation at https://docs.portworx.com/portworx-backup-on-prem/.
Create a backup
After creating any backup rules and schedule policies you want, you can use them to create a backup.
NOTE: Portworx Essentials license limitations apply to PX-Backup. Therefore, if your cluster is running on Portworx Essentials, you can backup a maximum of one cloud snapshot per day, per volume to cloud storage.
Refer to the Portworx Essentials page for more information about the supported features and limitations.
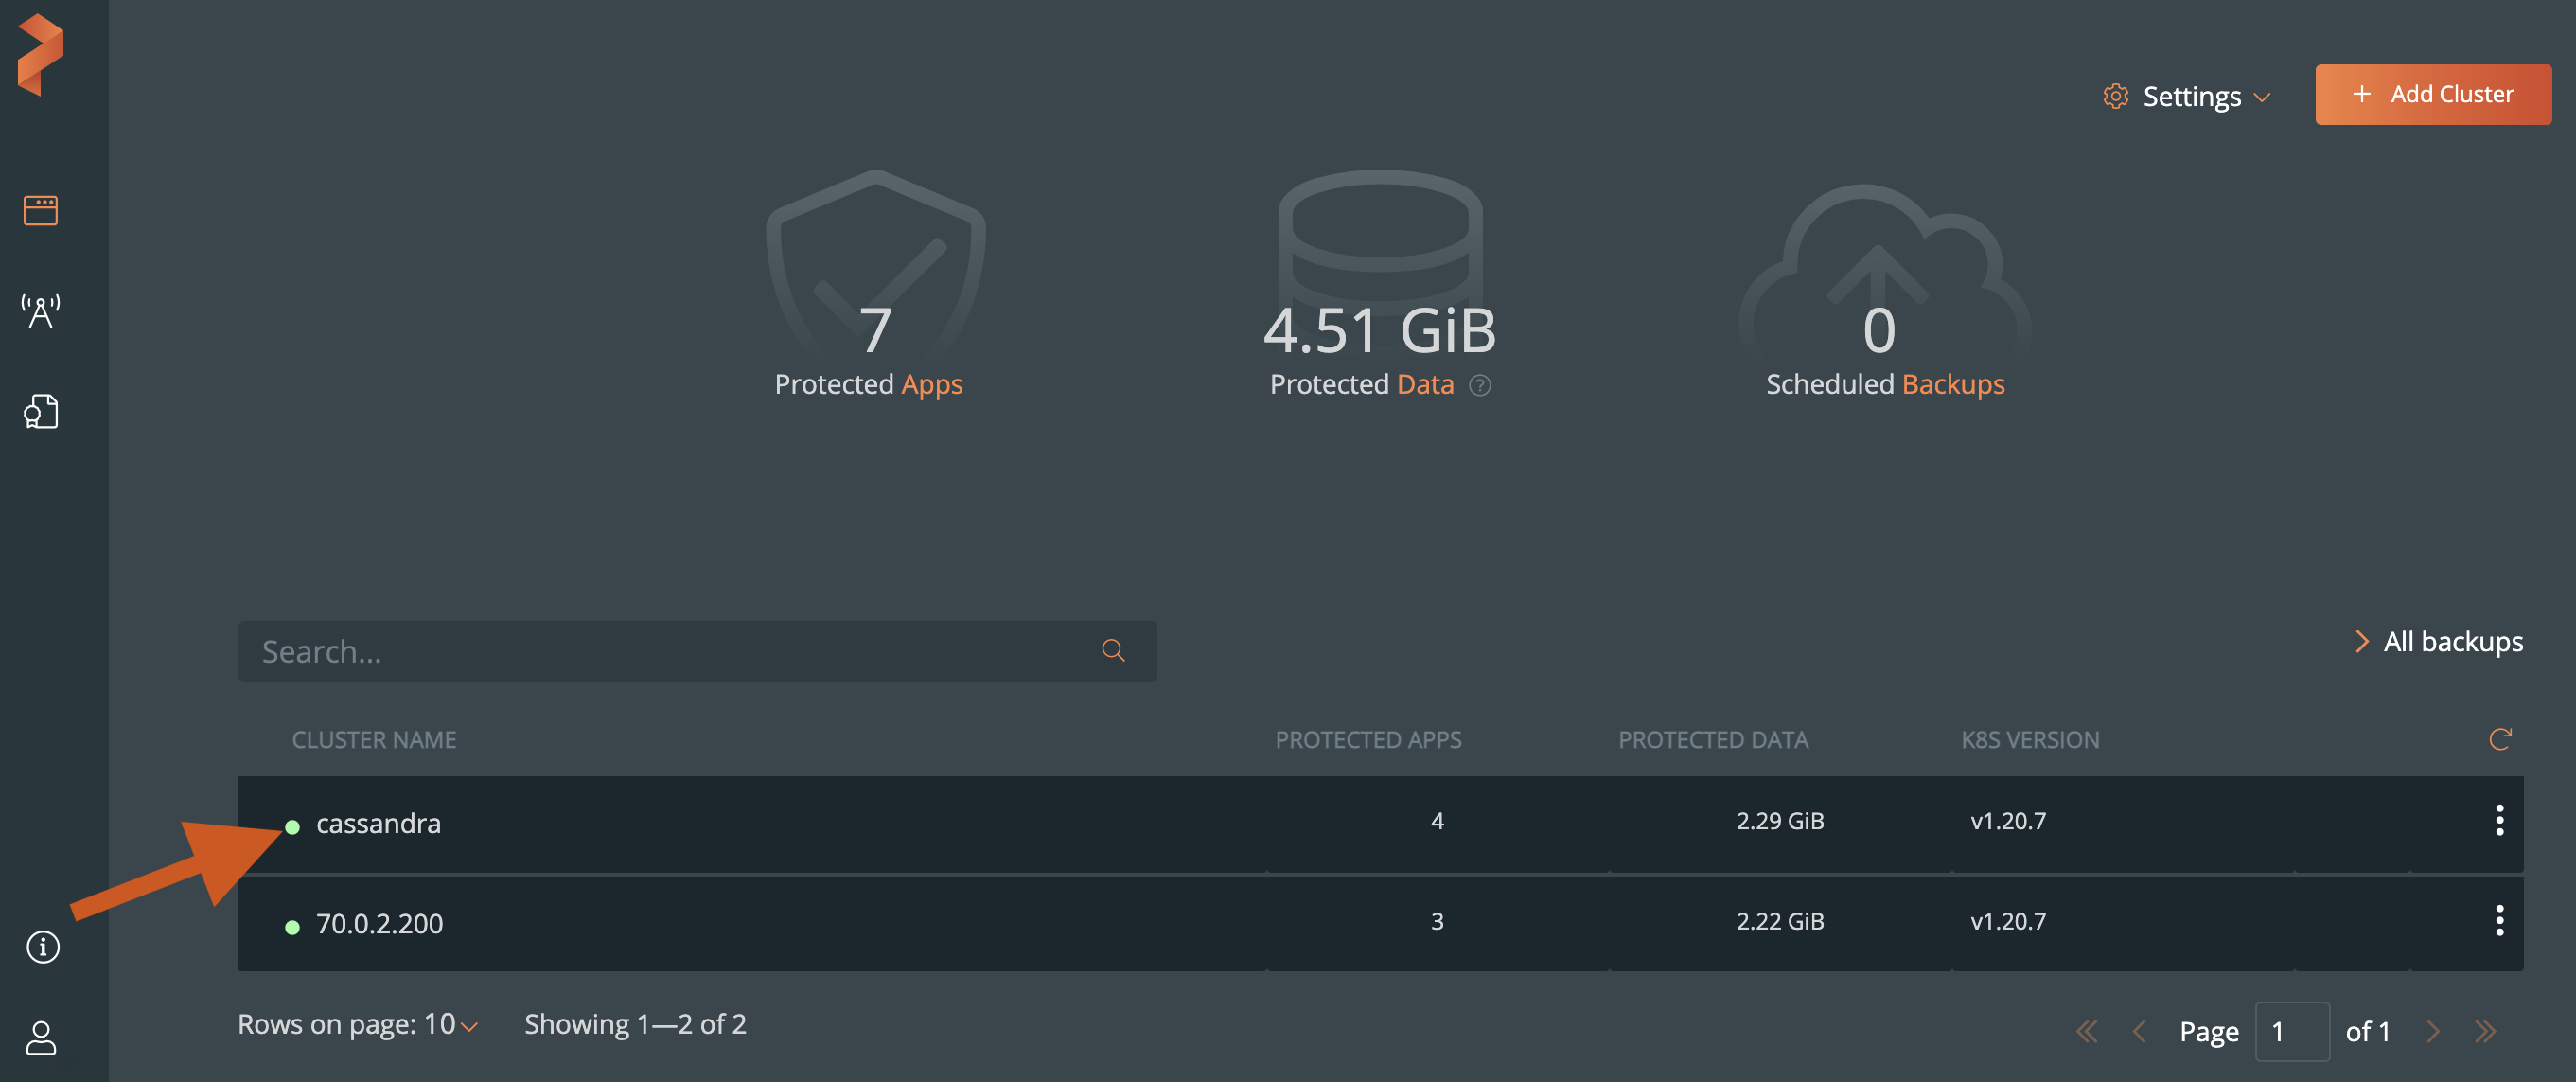
From the home page, select the Backup cluster you want to back up.
Select the namespaces and apply label selectors to filter the resources you want to back up.
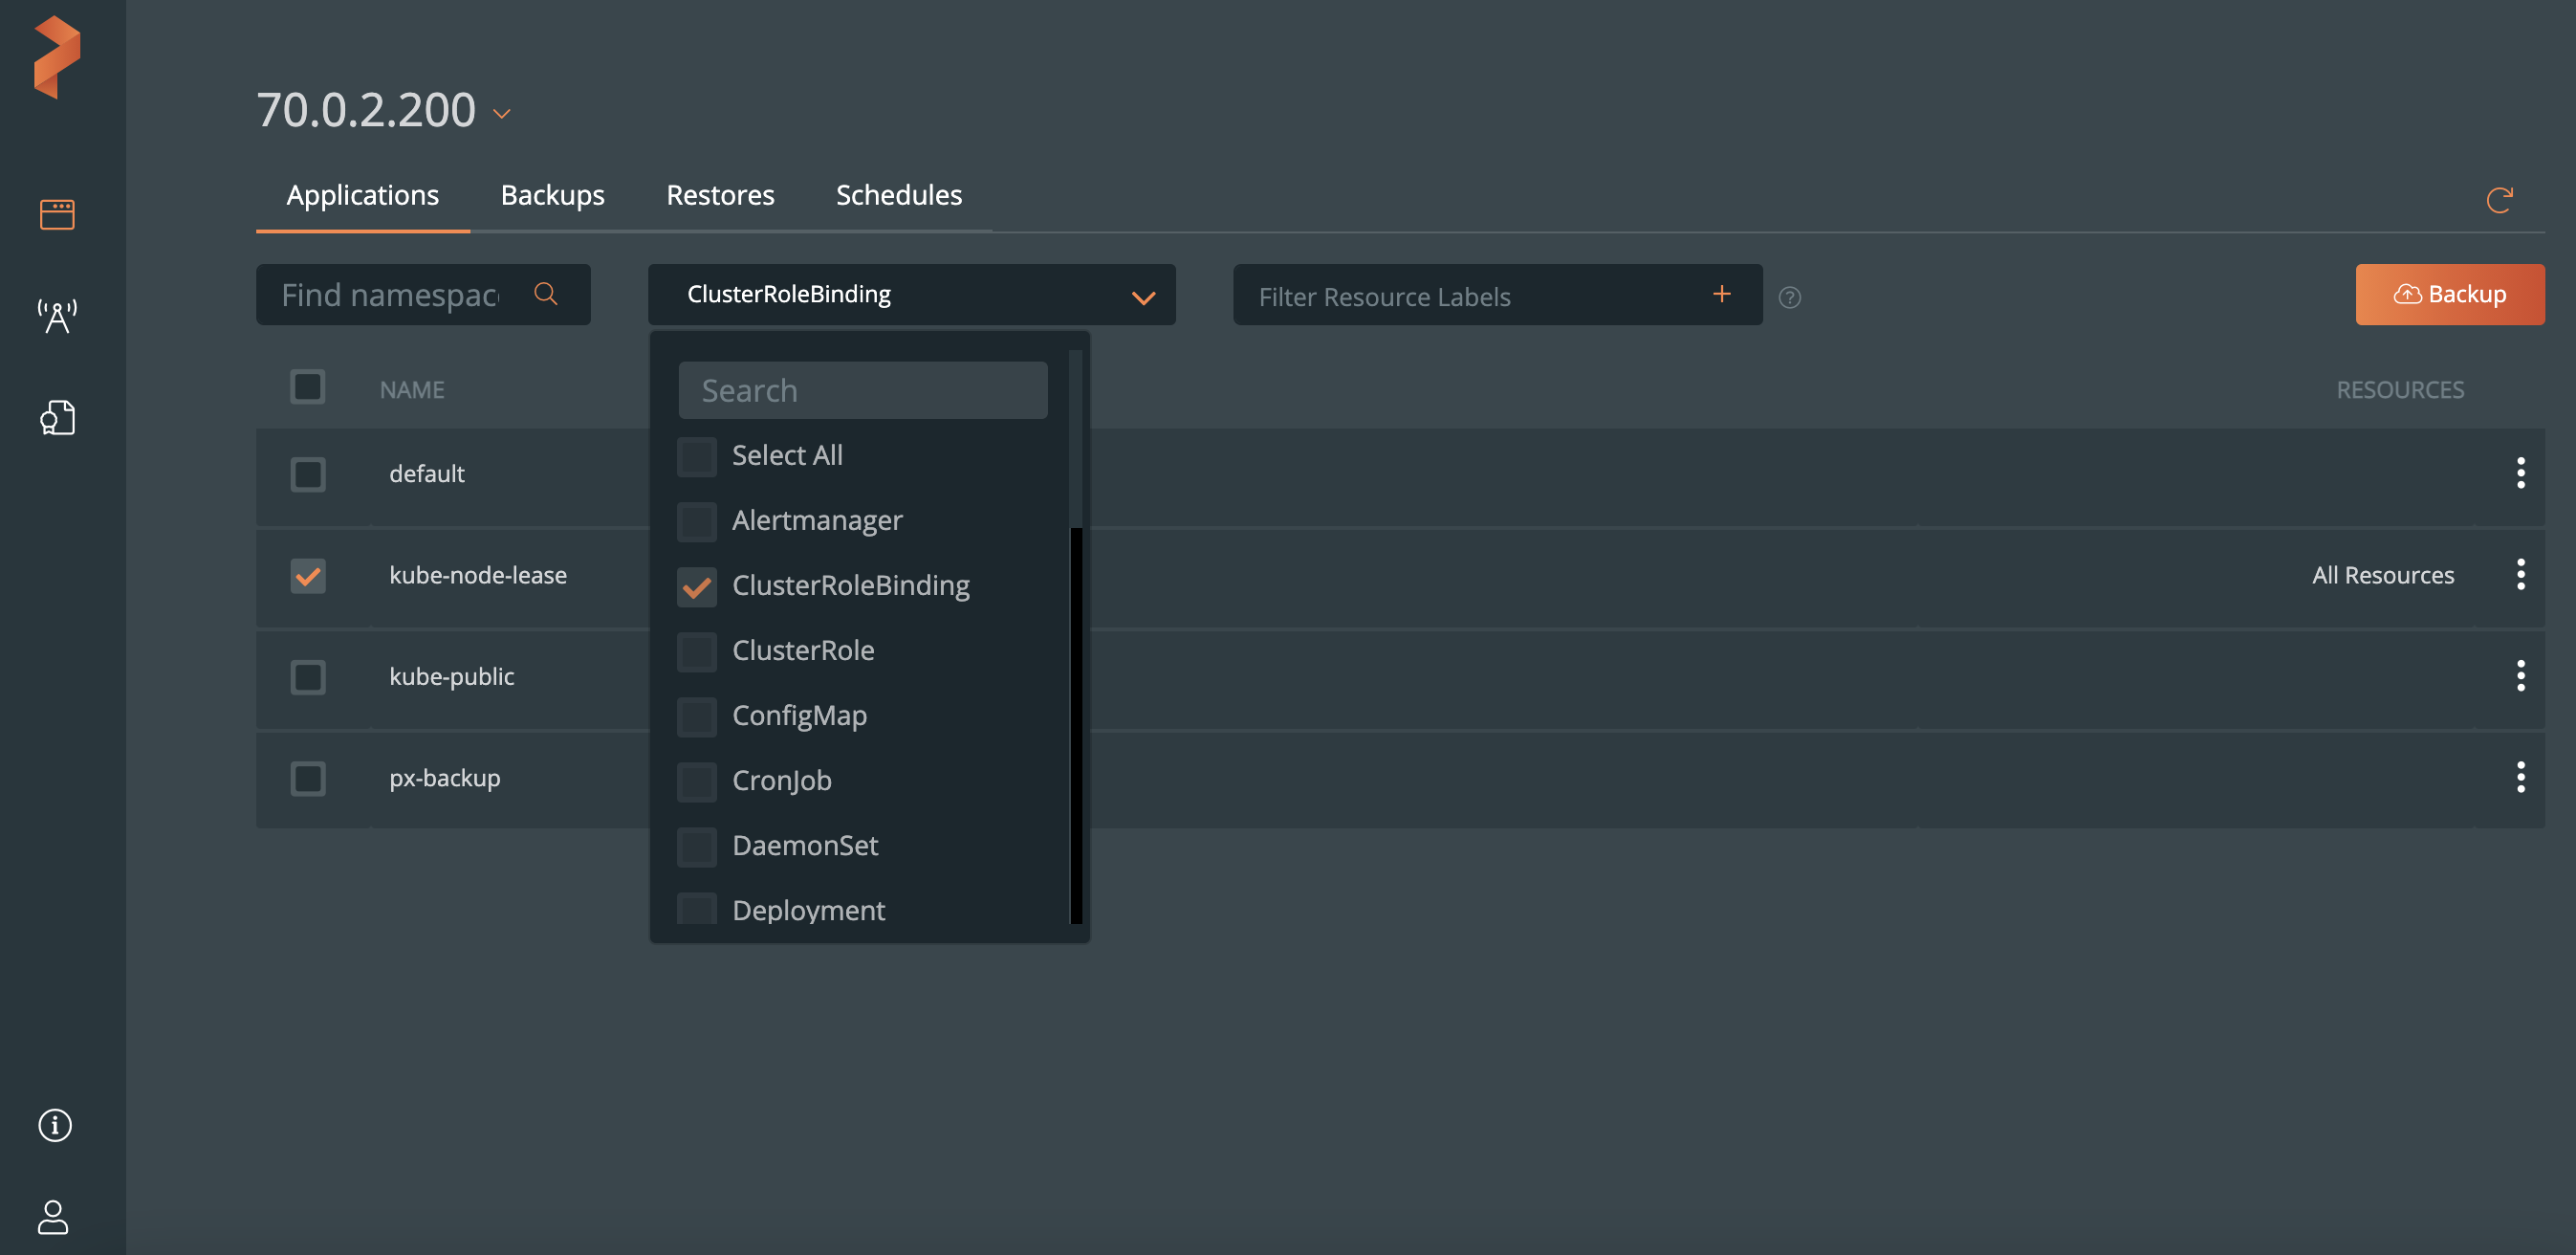
NOTE:
- To back up all namespaces, select the NAME check box.
- To back up all resources, select the Select All check box from the Select Resource Types dropdown list.
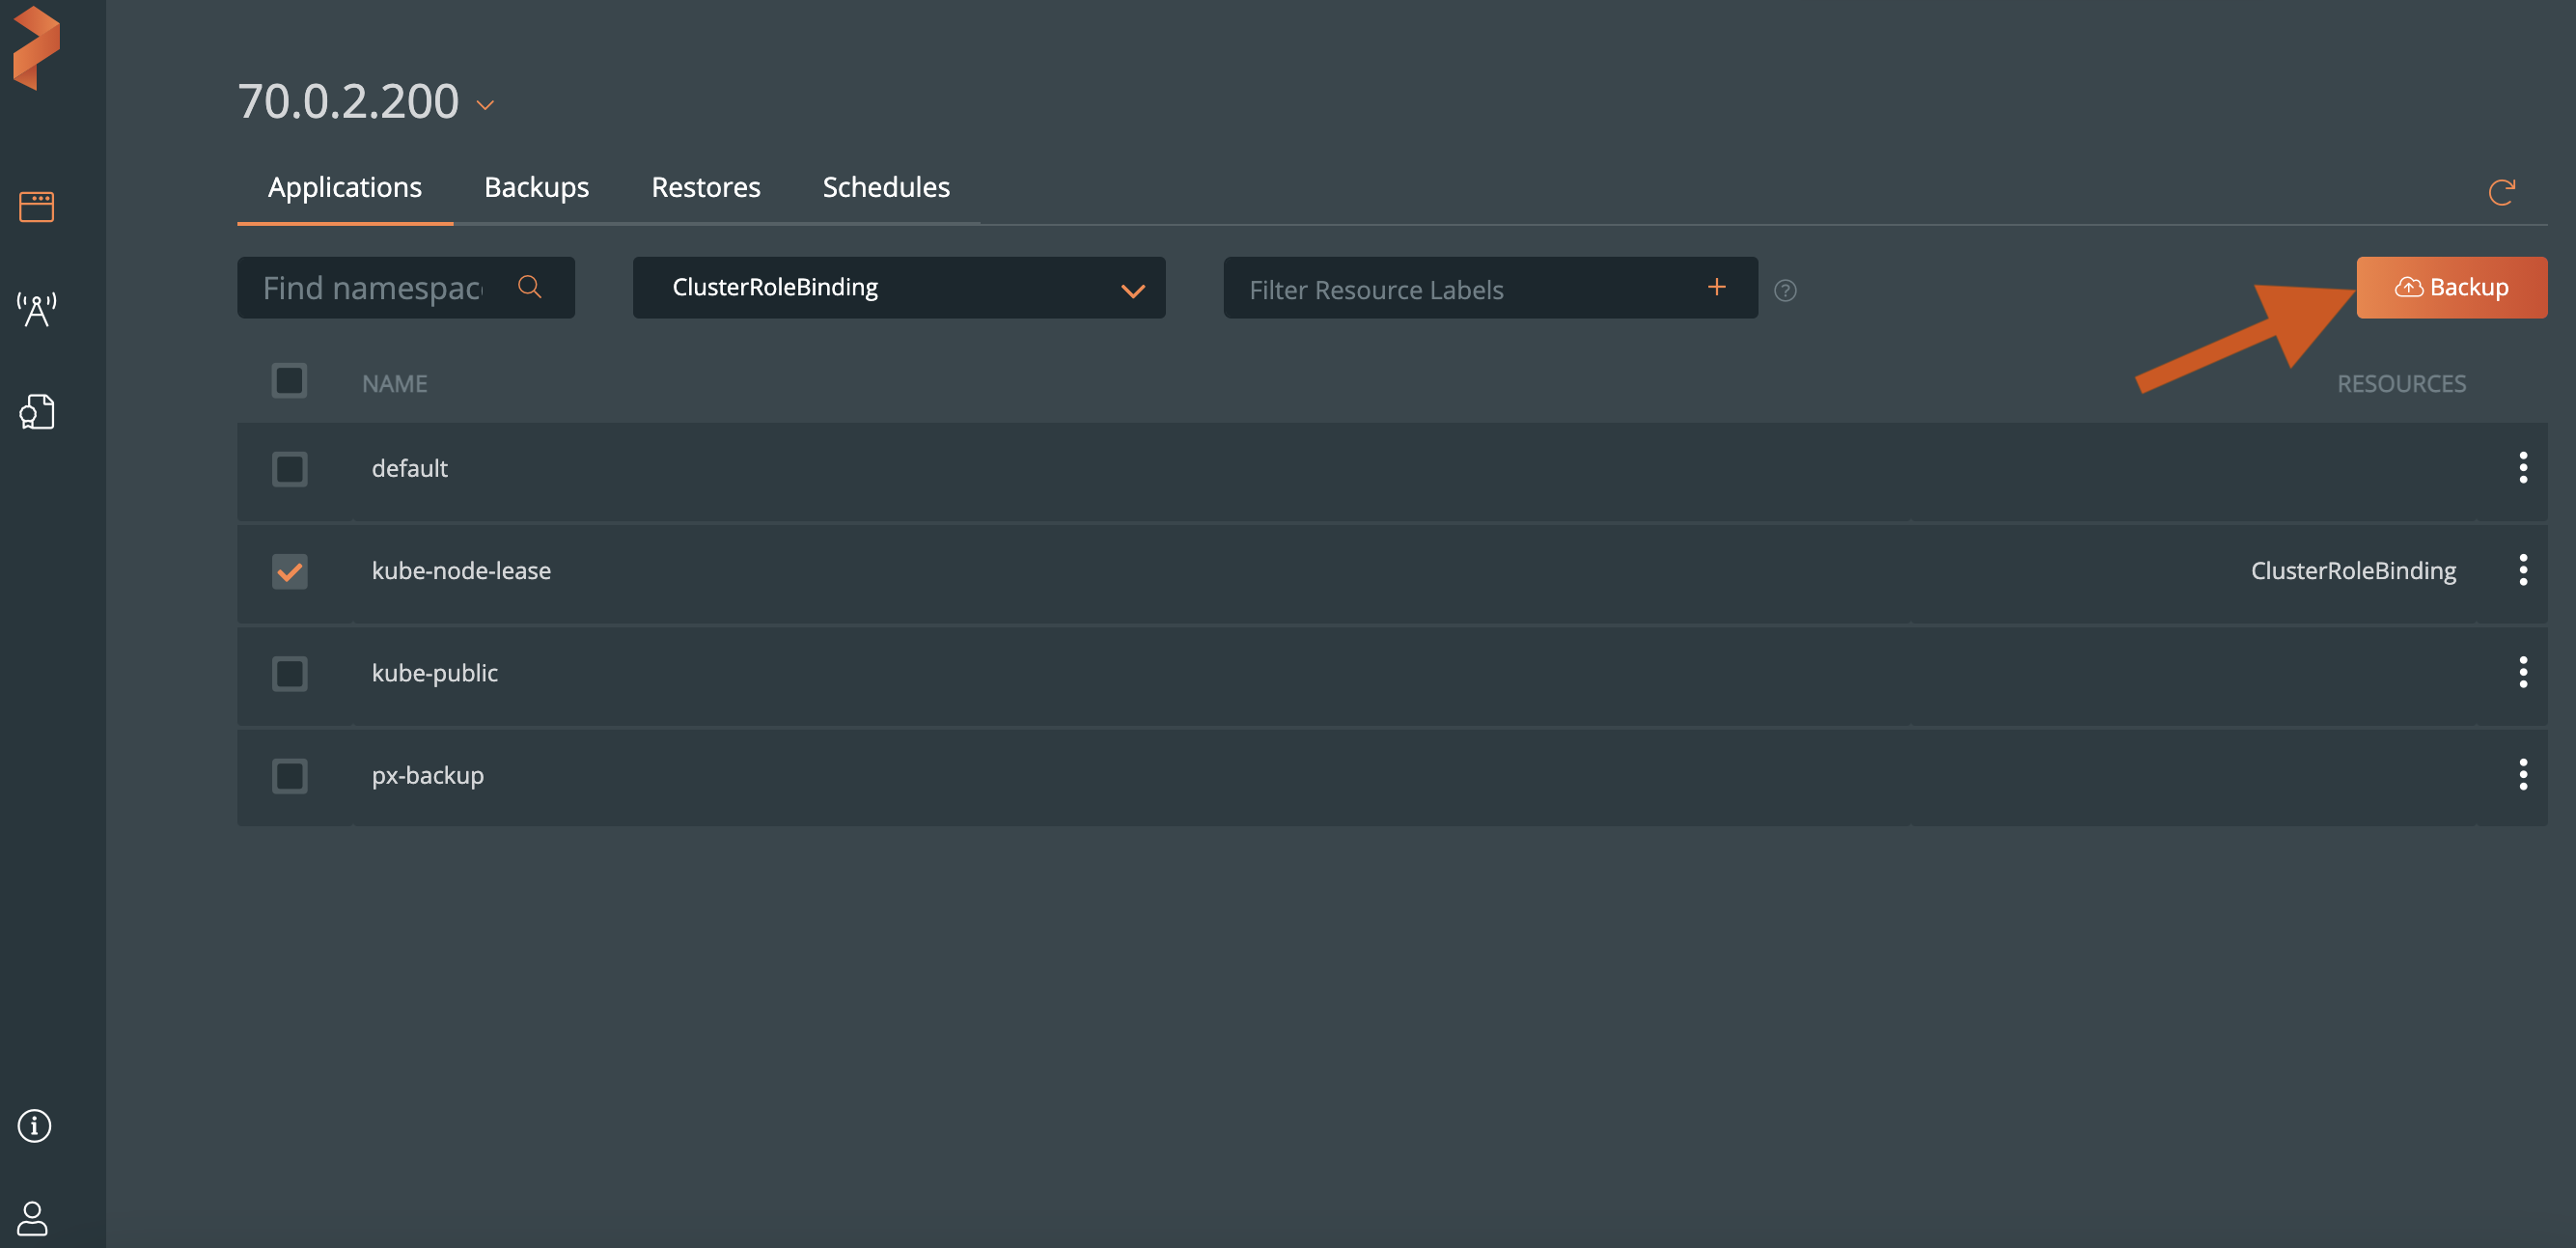
Select the Backup button:
From the dialog box, specify the following:
- Backup name: the name of the backup you want displayed in the PX-Backup UI
- Backup location: which bucket you want to store your backups onto
- CSI Snapshot Class: lists all the available CSI snapshot classes. Select a snapshot class to backup.
- Offload csi snapshots to backup location: Offload the CSI snapshot class to the bucket that selected from the Backup location. For more information about offloading CSI snapshots to a selection backup location, refer to the Backup CSI snapshots topic.
- Now or On a schedule: run the backup immediately or choose a schedule policy to associate with this backup
- Pre-exec rule: any rules you want to execute before the backup runs
- Post-exec rule: any rules you want to execute after the backup runs
- Backup labels: any labels you want to attach to the backup once it’s created
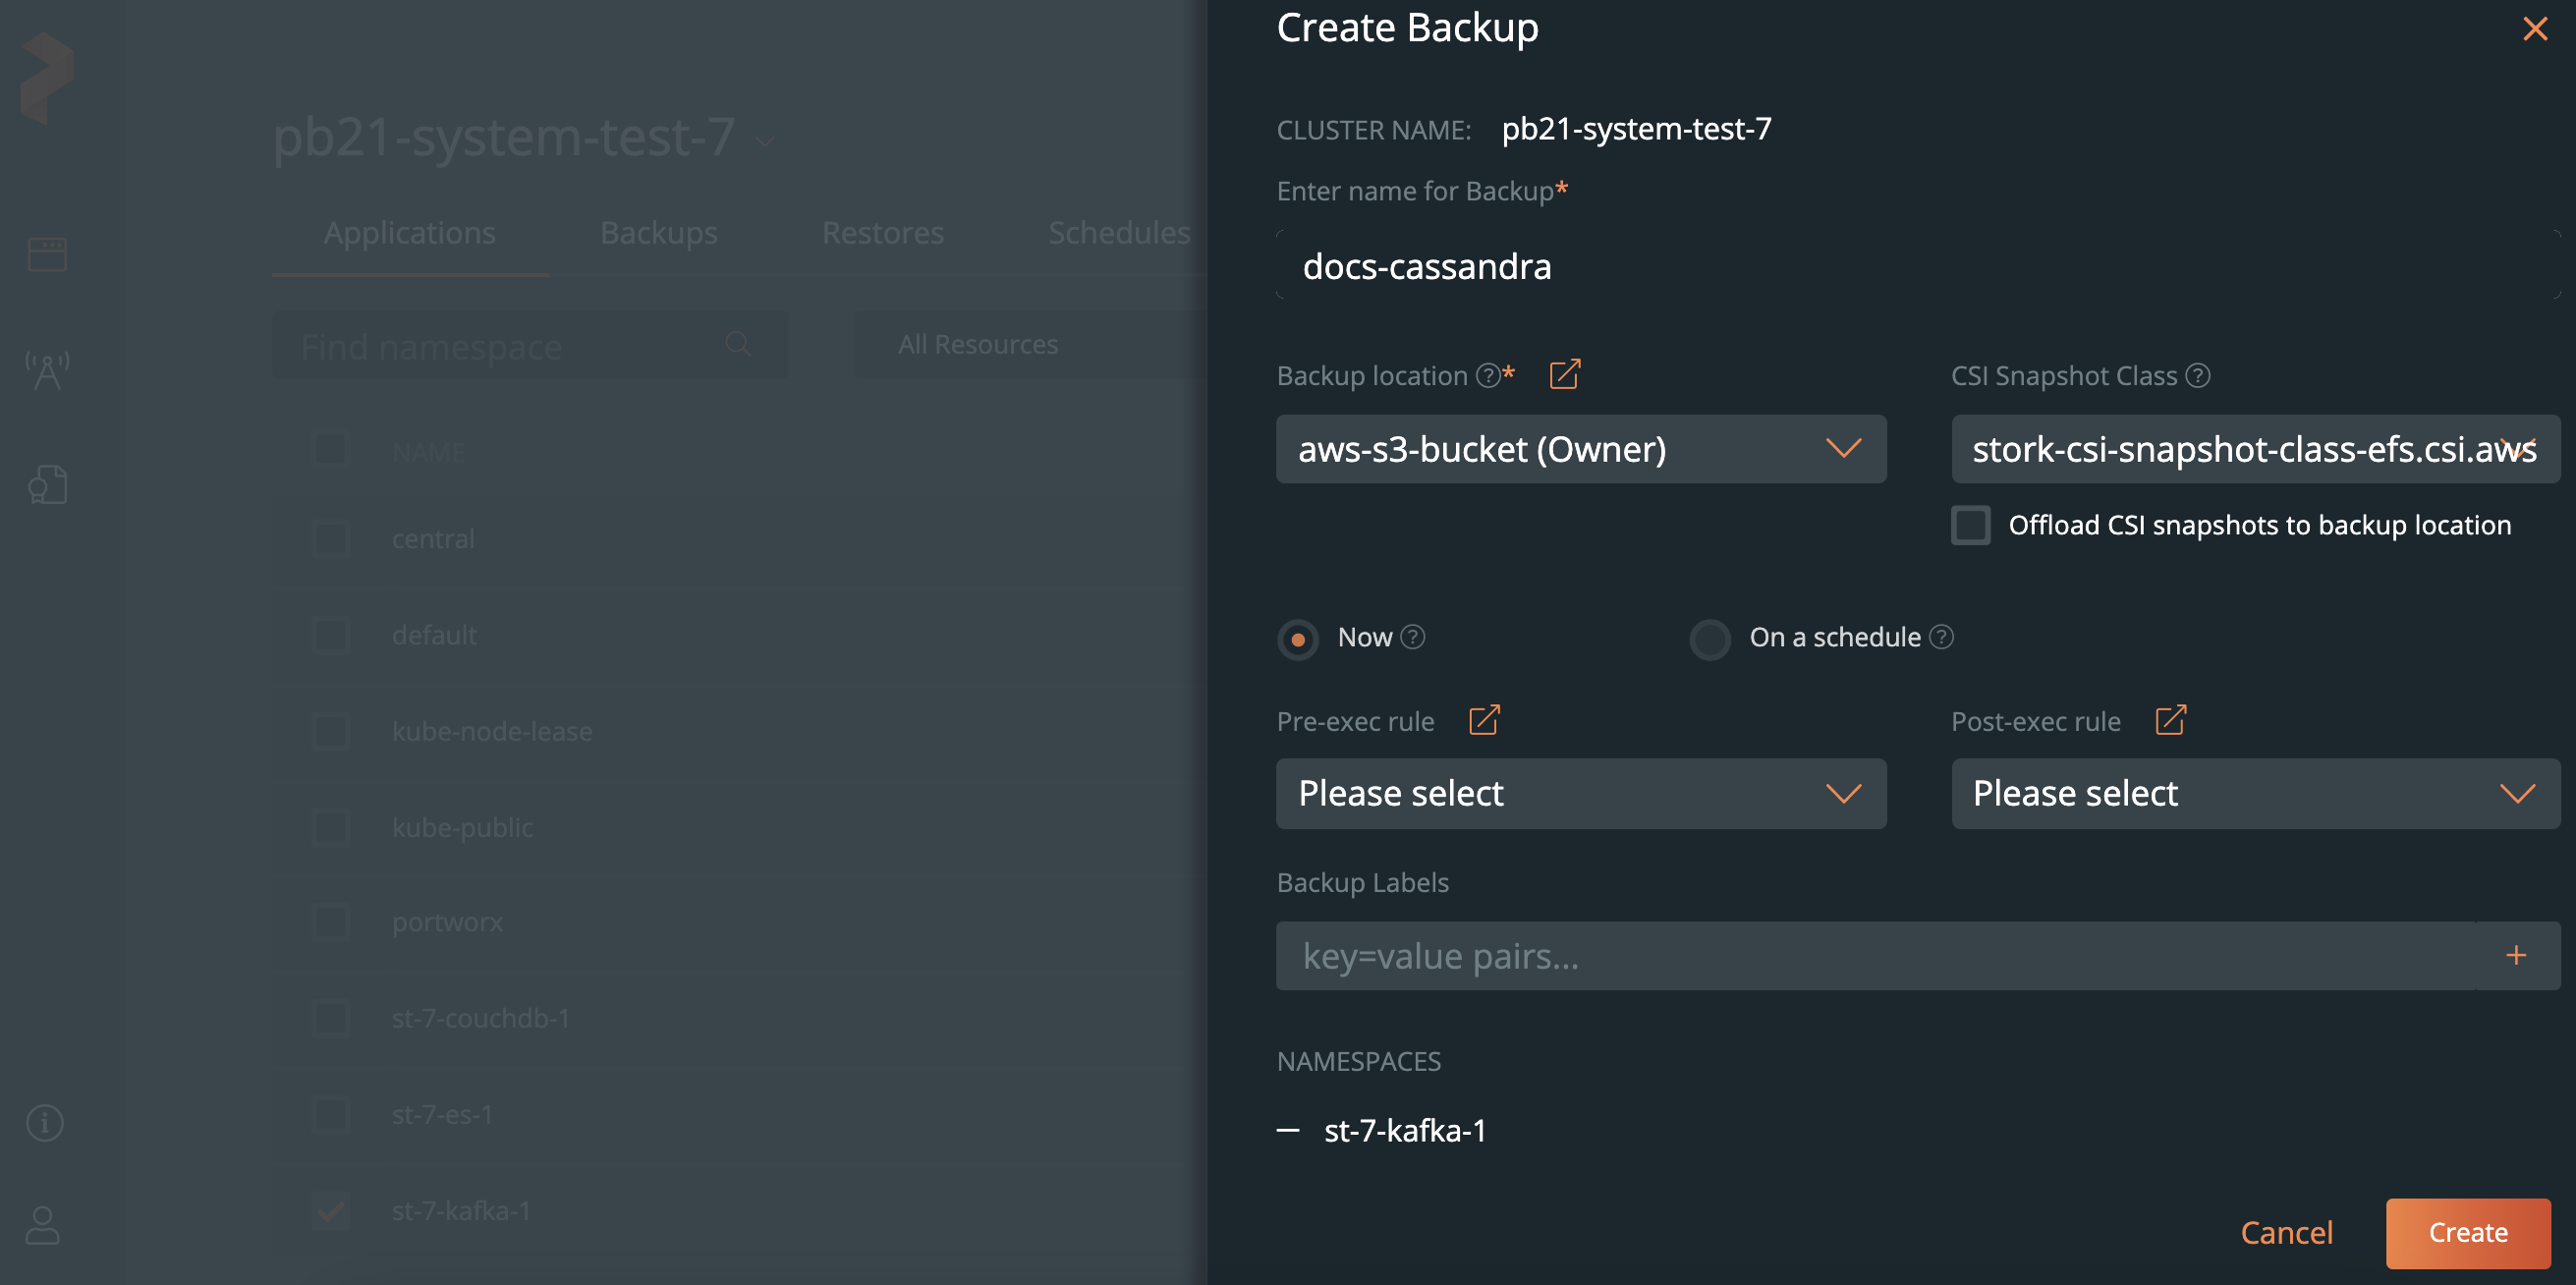
Click Create.
After creating your backup, you can monitor its status.
Related Videos
Last edited: Thursday, May 5, 2022
Questions? Visit the Portworx forum.