Manage users and user groups
The procedures in this topic explain how you can create users and user groups in PX-Backup with Keycloak and view them in PX-Backup Security.
Add users and user groups
Using the PX-Backup with Keycloak, you can add users and user groups in PX-Backup. Additionally, when you integrate your OIDC provider into the PX-Backup, all users and user groups that exist in your OIDC are added to the PX-Backup.
Note:
- If you are integrated with OIDC, then you need not create users and groups in PX-Backup Keycloak.
- Do not delete users and user groups that you added in the Keycloak.
To add users using PX-Backup with Keycloak:
Login to PX-Backup with Keycloak using the infrastructure administrator credentials.
In the Keycloak home page, select Administration Console.
From the Master -> Manage menu, select Users.
In the Users page that appear, click Add User:
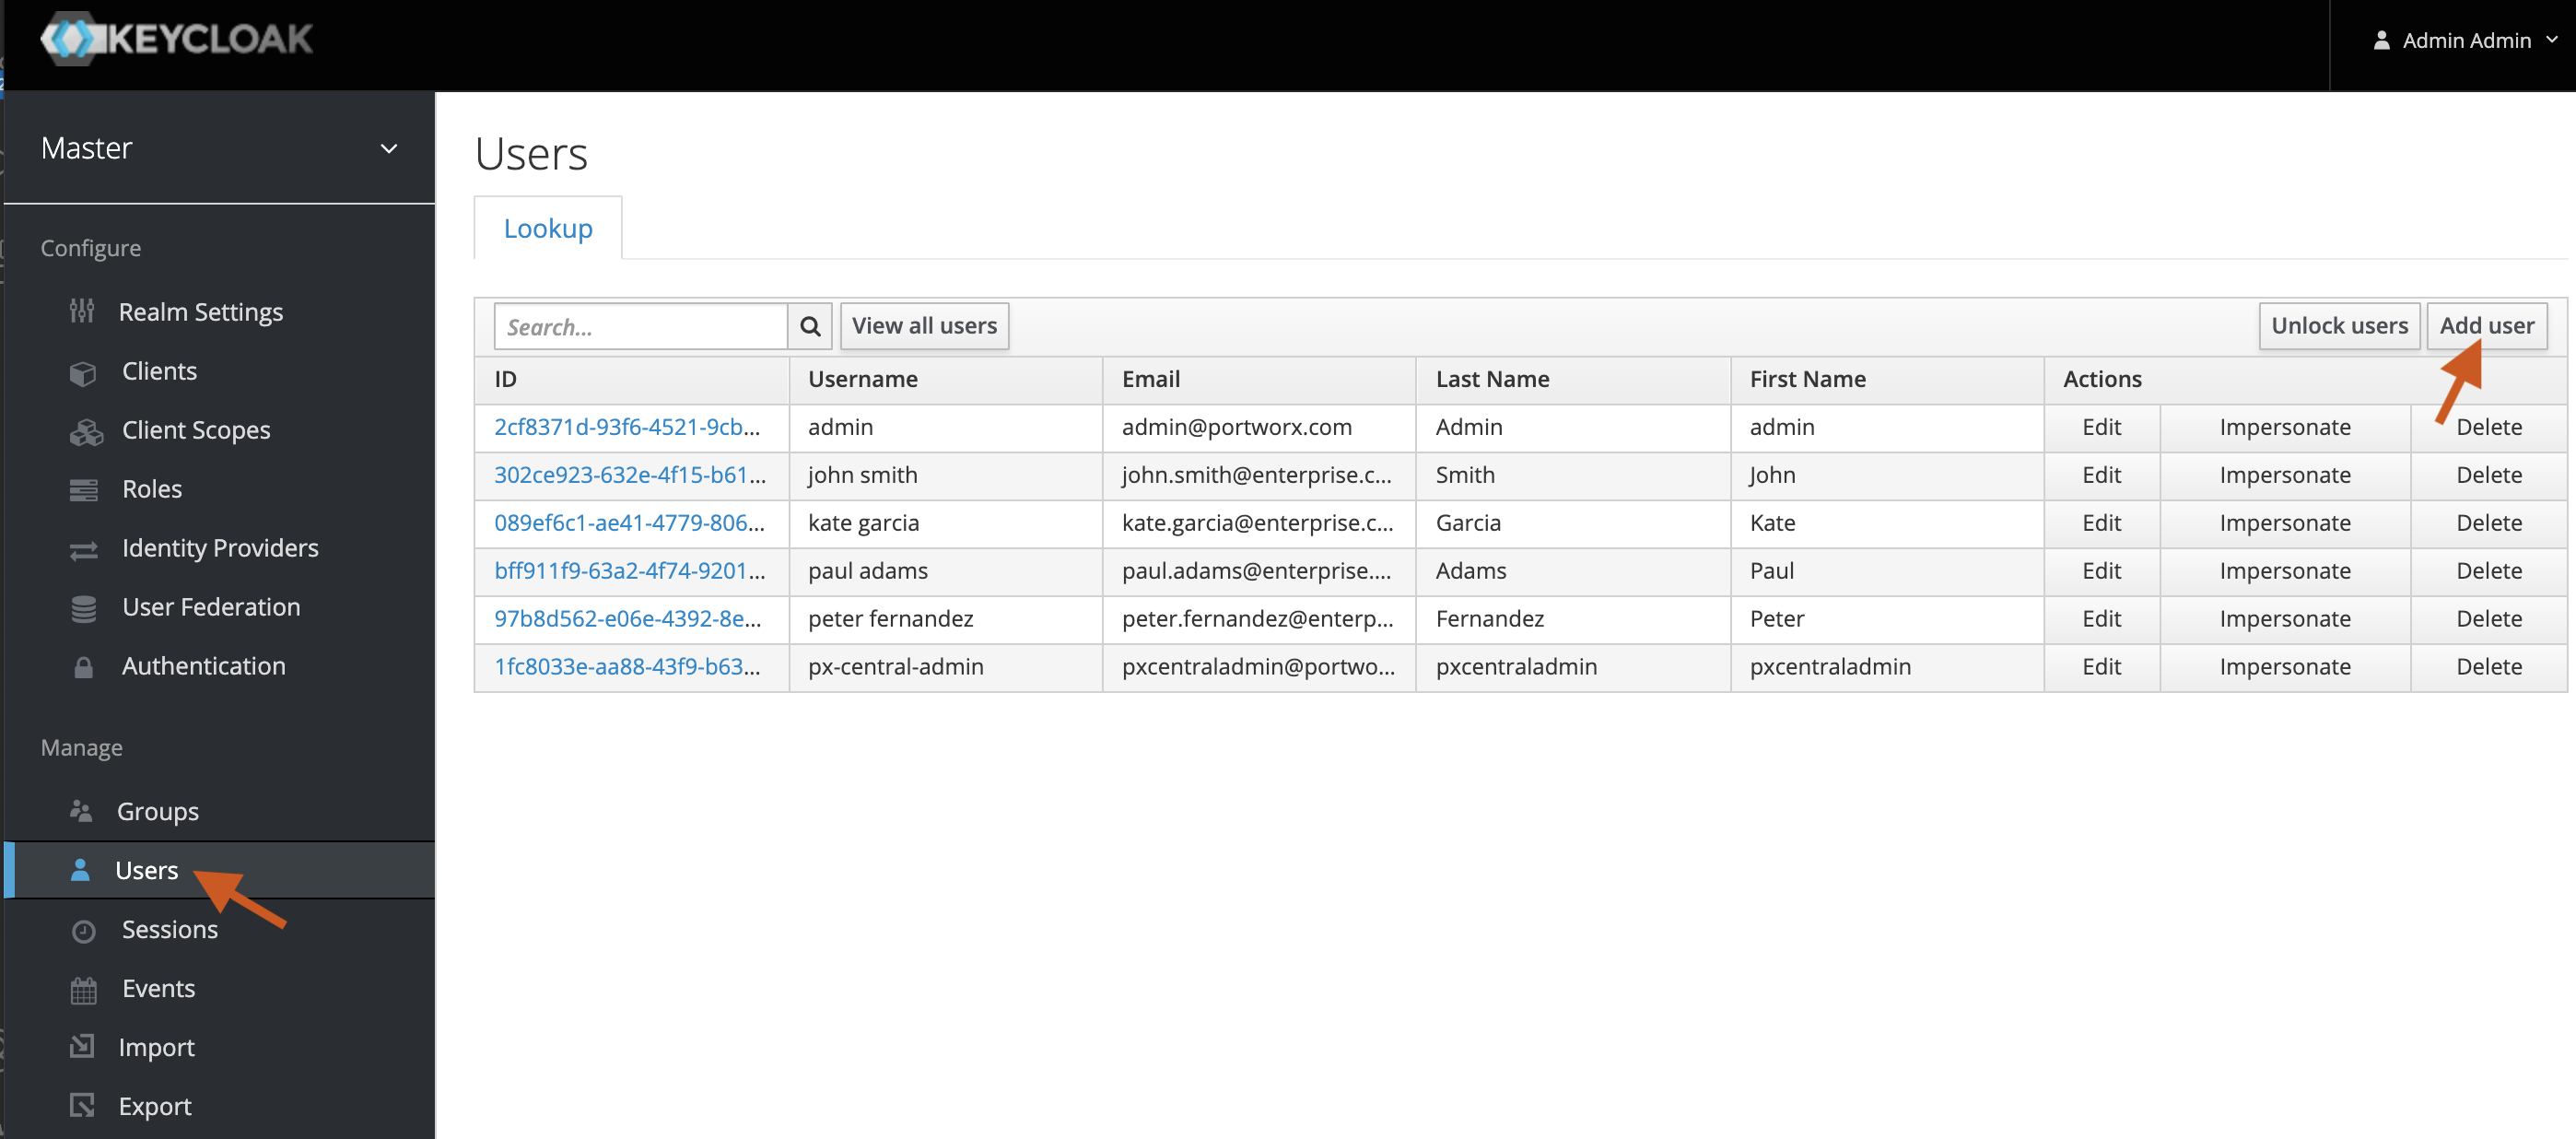
In the Add Users page that appears, enter the Username and other user details.
Click Save.
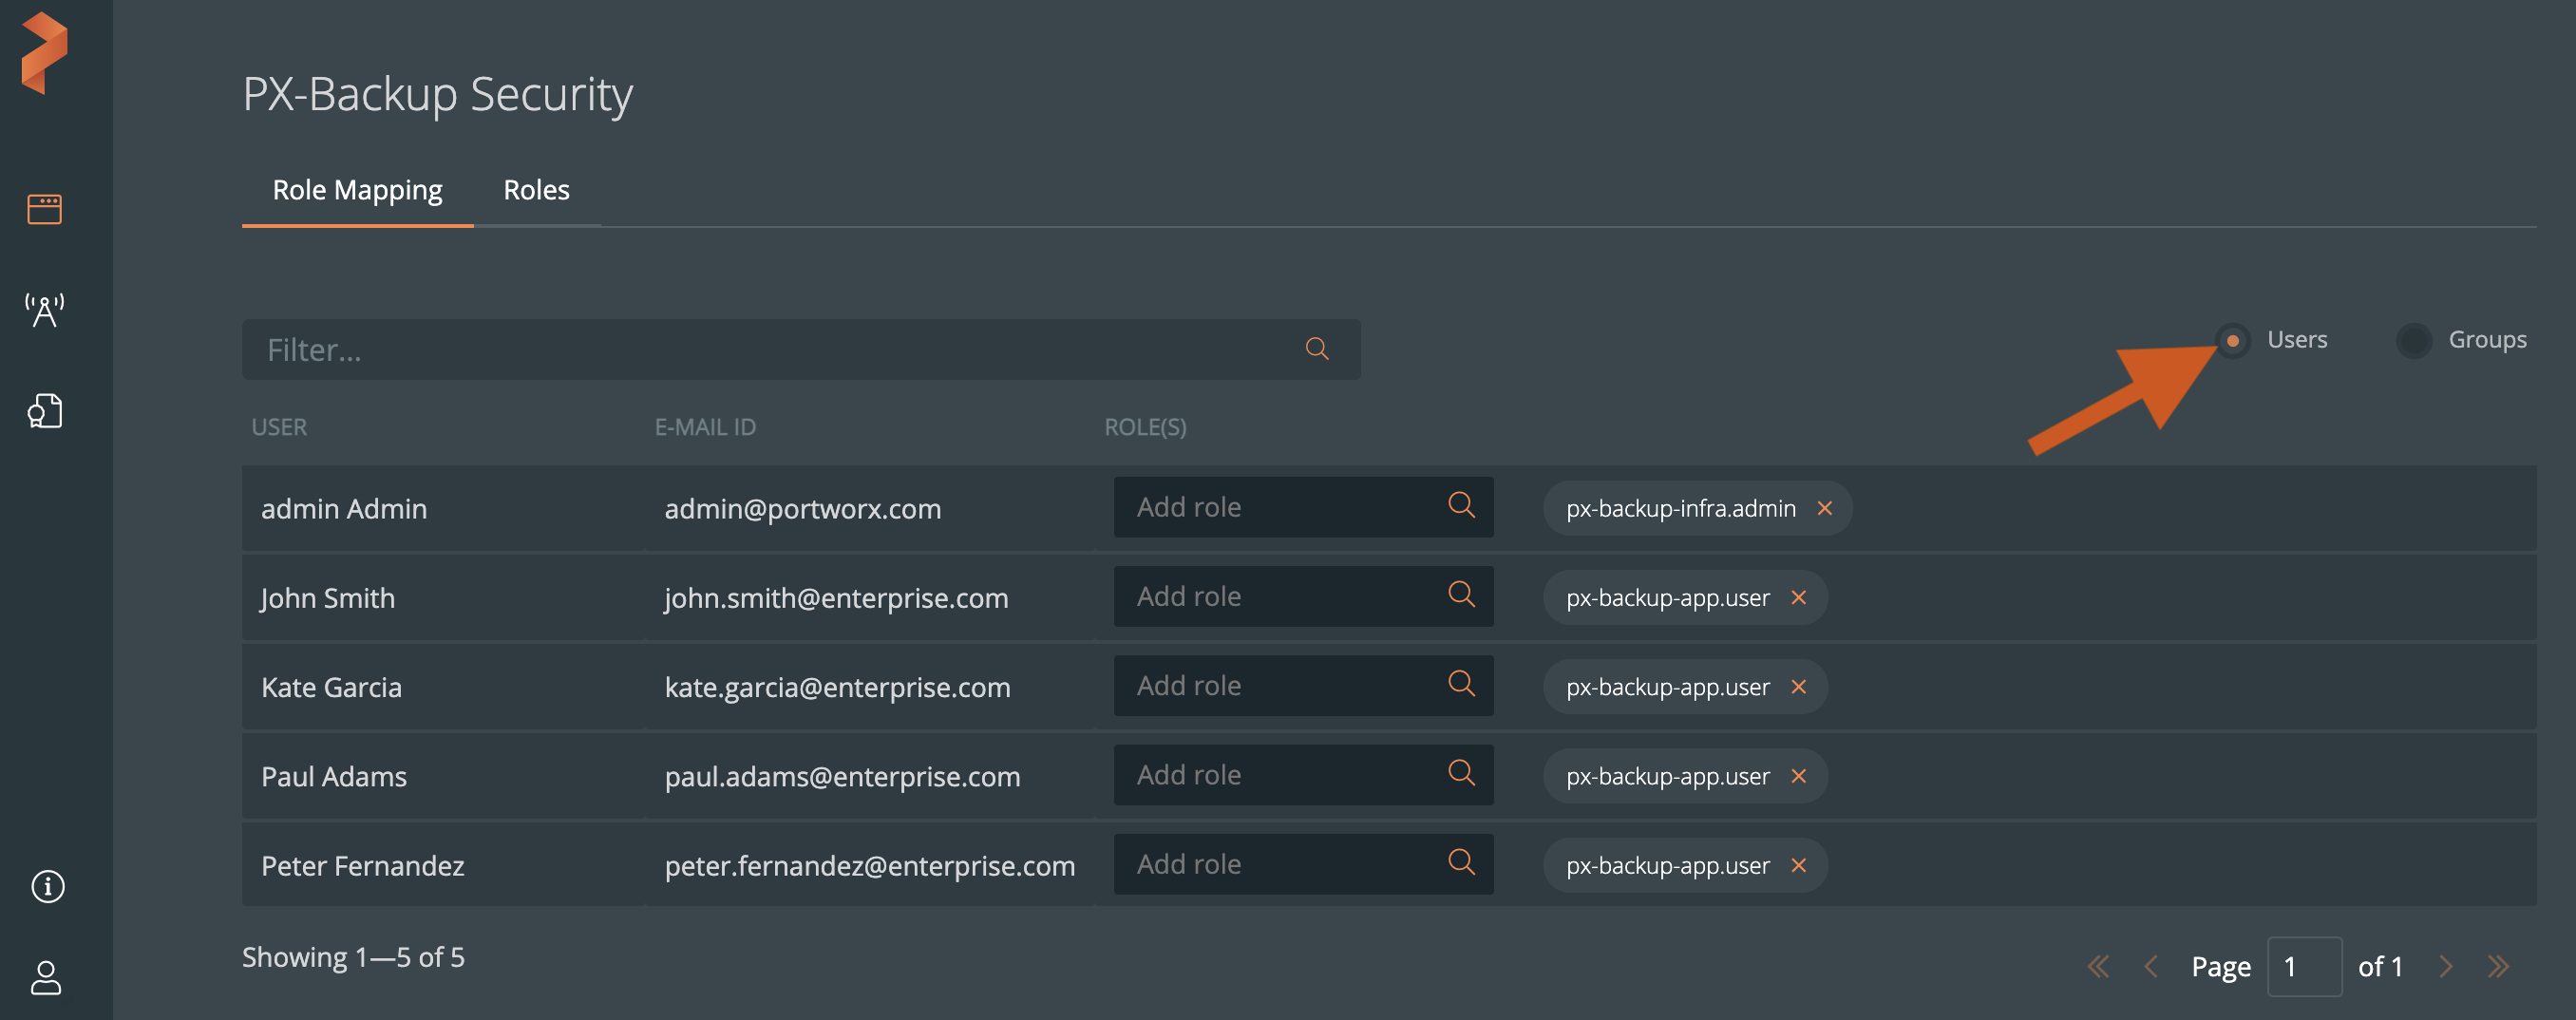
View users in PX-Backup Security
All users that you added in the PX-Backup with Keycloak automatically appear in the Role Mapping -> Users page:
To add user groups using PX-Backup with Keycloak:
Follow steps 1 and 2 in the above procedure to login to the PX-Backup with Keycloak.
From the Master -> Manage menu, select Groups.
In the User Groups page that appear, click New.

In the Create Group page -> Name text box, enter a user group name.
Click Save.
After creating a user group, you can edit it to change the group name, add group attributes, map existing roles to the group, and members to the group.
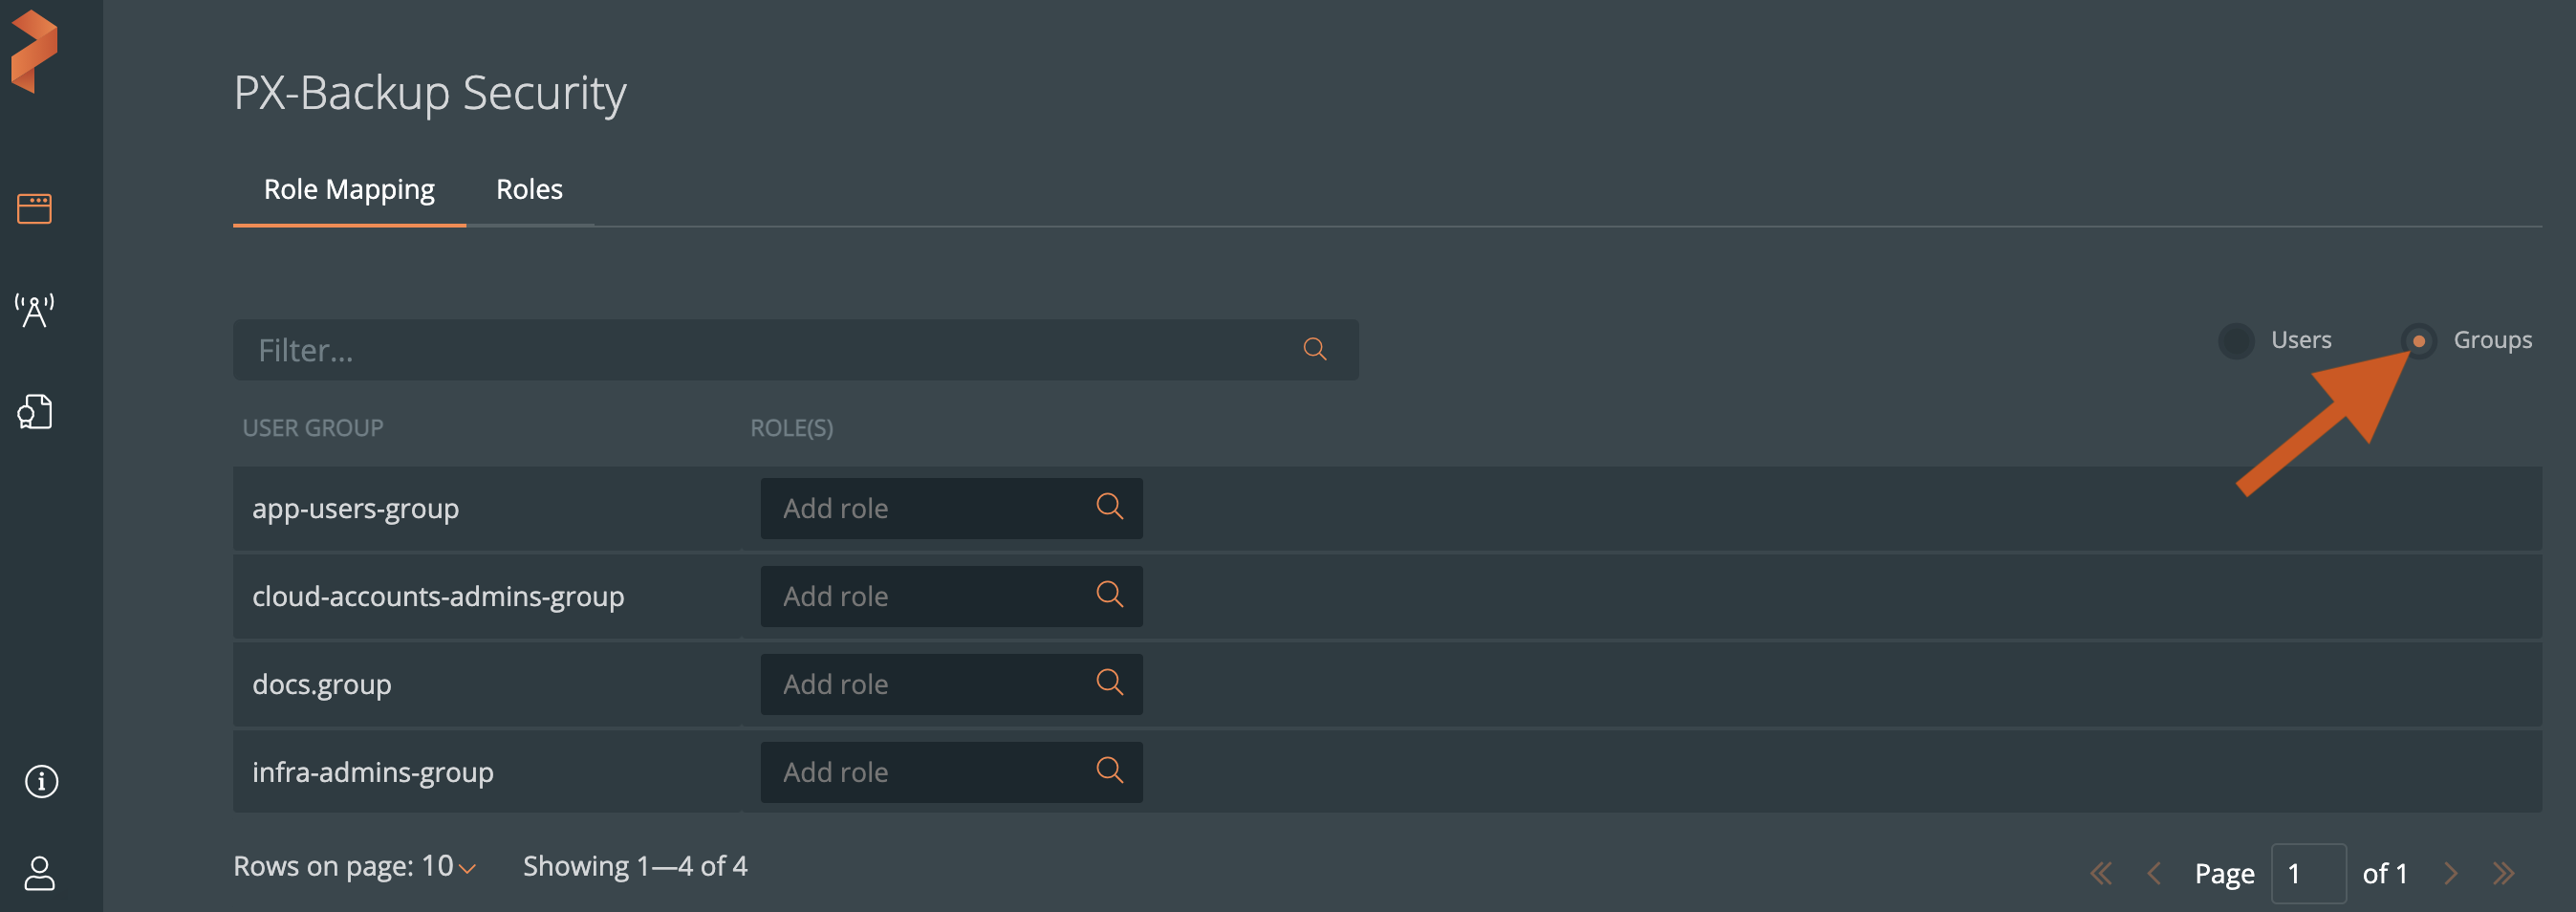
View user groups in PX-Backup Security
All user groups that you added in the PX-Backup with Keycloak automatically appear in the Role Mapping page. Choose the Groups radio button in the Role Mapping page to view user groups: